
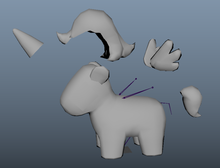
Snuggles the Unicorn
|

|
VFX


Sampling of some of the VFX library that was created for this project and carried into future projects to use for prototypes and building blocks
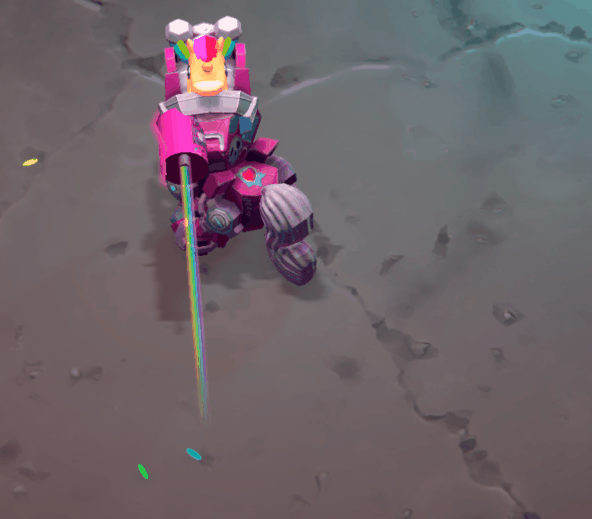
Hell Portal Opening cutscene from the canceled project "Snuggles the Unicorn". My team inherited the project and built on it. The edits I made included adding the bunny rising and exploding animation, sound FX, the skull mesh, blood splatter VFX and blood decals, and the unicorn's animation trigger. I also implemented the portal opening VFX from parts of an asset used elsewhere in the project.
Shaders

Slightly older version of the shader where the arc is not going in the correct direction
|


|
Customizable Flapping Wings Vertex Shader System:
- Our character designs included wings on all of the enemies. We were using a variety of pre-made assets from the asset store, which we could modify slightly but to add wings to the existing rigs would have meant a lot of rig and animation modification which would balloon in scope and add issues.
- I researched adding some rigged wings to each enemy, parent constrained to a shoulder bone and which each had their own animation. I was able to find a $5 asset to test out the feasibility of this method. It looked great, but severely impacted performance when you had multiple enemies on screen, since for each enemy we were now adding 32 bones on a ~700 vert mesh.
- I took a lesson from Abzu's schools of fish, and came up with a vertex shader solution. I made a simple mesh model prototype (which could be easily swapped for a more polished model and texture) and made a custom shader that would give the mesh a flapping motion, including controls for the flap speed. This system included a script that could be called to set the flap speed to certain values depending on the velocity of the enemy, its alive state, and more, individually per asset via Material Property Blocks.
- Additionally, I made these as separate wings (one with just a negative scaled version for the other side) so that they could be scaled and positioned appropriately for the enemy they were going onto.
- One issue that came up was that since the shader was based on time, each enemy flapped at the exact same time, which looked unnatural. I created a reusable property called Material Index that would generate a random number for each instance of a game object, and pass that number to the shader (again via Material Property Block) to offset the time value for each instance.
- This gave us the combination of look/feel, believability, and performance that we needed, and was scalable to all of the possible needs of these assets.
- This did, however, conflict with our character outliner solution, which is meant to outline the enemy when they're behind an obstacle. The outliner either considered the mesh's static position, or if we excluded them then the mesh would occlude the body and cause outlining to occur in odd places. I was working on a solution for this when the project ended.
UniMech: Model Prototype, Rigging, Asset Prefab Set-up, Control Scripts
Created a quadruped mecha prototype using the model and animations from a bipedal mech. Kitbashed parts from the biped to create the quad shape, and created a skeletal rig, driven in Unity by position/rotation constraints from the original biped mech to borrow its leg animations (mapped to front and back to create a galloping motion from a biped walk). The upper body of the quad mech is a swivel that rotates based on the aim direction, and allows the body to bob without affecting the upper cockpit. This was done with a special set-up involving a particular skeletal hierarchy combined with Unity's hierarchy and constraints.
There are no arms on the cockpit base, as weapons are added in when the character spawns based on the player's selected loadout.
I also wrote the cockpit aim scripts to work with both mouse position and controller joystick, linking into our existing control system.
There are no arms on the cockpit base, as weapons are added in when the character spawns based on the player's selected loadout.
I also wrote the cockpit aim scripts to work with both mouse position and controller joystick, linking into our existing control system.

Cockpit maintains an aim constraint while the body moves around

Model sheet for updated mech
|

Original rabbit mecha from Unity Asset Store (credit VaxKun)
|
Models


Updated model with changed proportions, shape, and larger tusks
|

Original model from Unity Asset Store (created by Suriyun)
|

Updated model with new coloring and added mouth mesh skinned on top of the original. Mouth is borrowed from another enemy asset we didn't use.
|

Original model from Unity Asset Store (created by Suriyun)
|
Player model update
One of the major challenges with the project was to update the player model to the new concept art without remaking all of the animations that we got along with the original asset. Because the proportions of the rig changed, and the animations had position keyframes (tsk tsk), I developed a puppet rig system that uses the rig and animations from the original asset (without a skinned mesh), to drive rotation constraints on the new rig and mesh. This had a negligible impact on performance because we were not trying to drive skinned verts on more than one model, and mad a major budget savings from not recreating all the animations.
Since we had to break and reconnect these constraints a number of times as we updated the asset, I created a script that iterated through the skeletal hierarchy and made these connections automatically, making it not only faster, but reducing user error from so many manual clicks.
Since we had to break and reconnect these constraints a number of times as we updated the asset, I created a script that iterated through the skeletal hierarchy and made these connections automatically, making it not only faster, but reducing user error from so many manual clicks.


Comparison of original model/rig to the updated version. The existing animations were able to work by using rotation constraints.
|

Original model from Unity Asset Store (created by Suriyun)

Concept for updated version by Rowan Sherwin
I also separated the parts of the mesh in the new model version so that they could be swapped out for character customization.
|
Tools
Scene Composer
Puppet Rig Creator
Puppet Rig Creator
